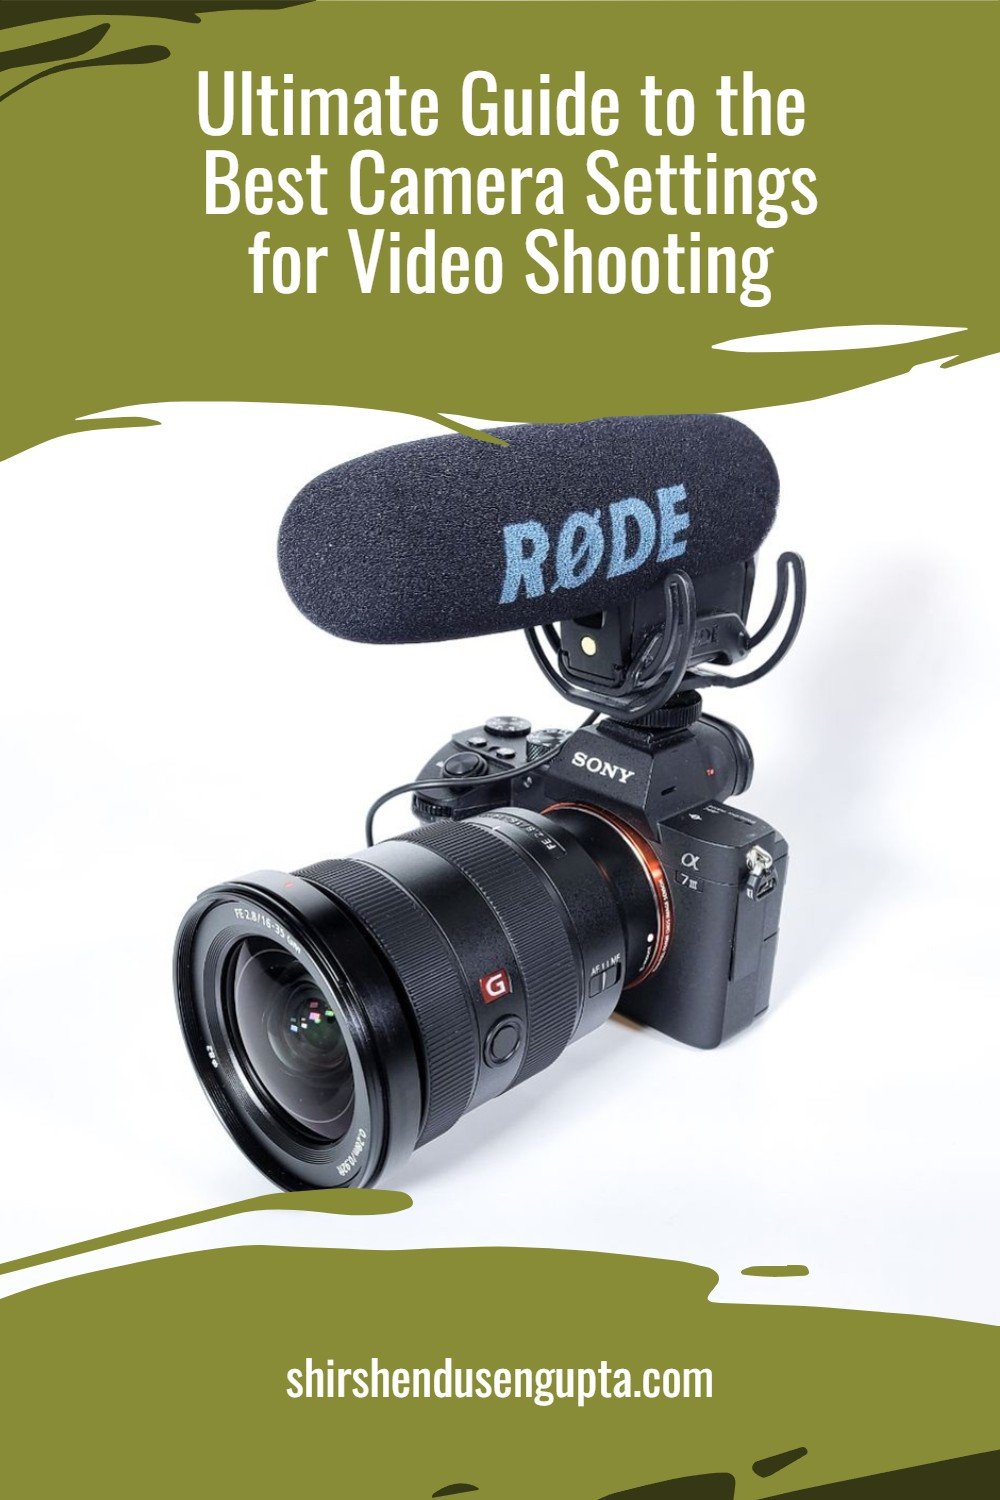
Ultimate Guide to the Best Camera Settings for Video Shooting

Camera Settings - An Enigma for a Beginner Videographer
Every day, we get questions from our readers about the camera settings we use for videography which can be leveraged as a standard across any camera model. As a matter of fact, we do have an extensive set of ‘fixed’ settings that you can set up once and for all and forget about them since they are not dependent on the shooting conditions. Additionally, there are a set of ‘variable’ settings that you need to change on the fly according to shooting conditions. We arrived at these after a lot of trial and error and are more or less applicable to almost all brands of cameras available in the market. Today, I’m here to share them with you!
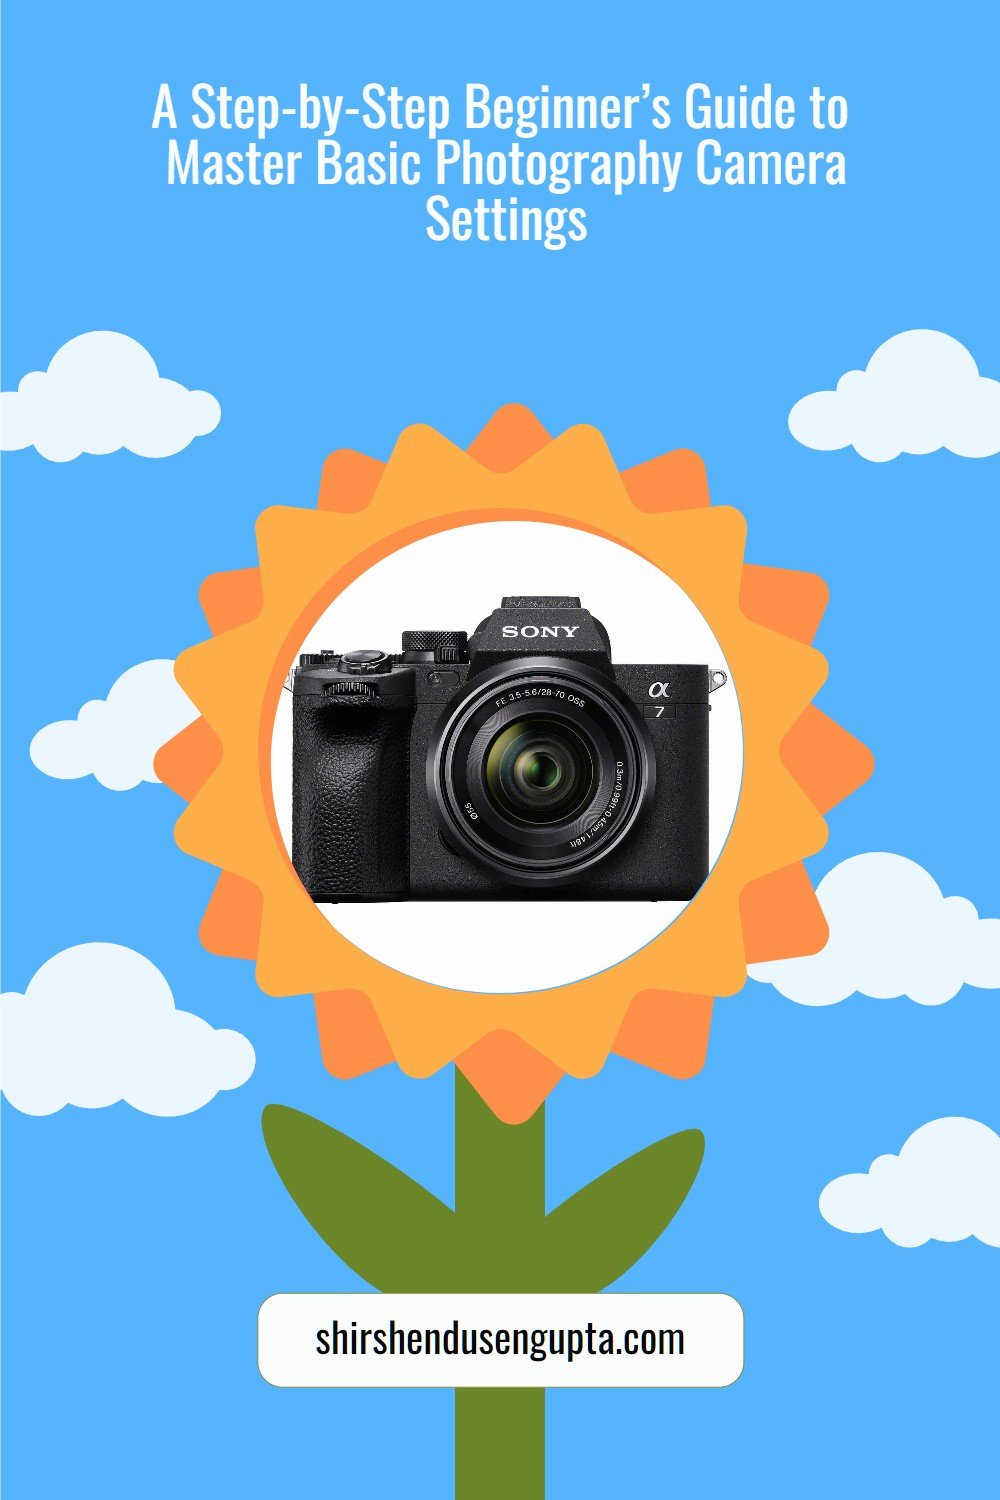
But before you set up your camera for videography, you first need to set up your camera for photography which will serve as the basis for the videography settings. To know the extensive list of basic camera settings that you must use to set up your camera for photography, I recommend you to read our article A Step-by-Step Beginner’s Guide to Master Basic Photography Camera Settings | Best Manual Camera Settings for Beginner Photographers. Additionally, if you want to fully transition from shooting in ‘Auto’ mode to ‘Manual’ mode, learn how to ‘Expose for the highlights,’ understand the histogram, and learn the composition rules, I recommend you to read our article A Step-by-Step Beginner’s Guide to Master Manual Mode Photography | Manual Mode Photography Tutorial | 14 Ultimate Tips and Tricks for Shooting in Manual Mode.
Basic ‘Fixed’ Camera Settings for Videography
Let's start by going through some camera settings that should be applicable to any contemporary digital camera. Since the following settings are essentially the same for all brands and types of cameras, you should be able to find them under the settings menu of your camera. I'm providing them in the order they appear on my Sony camera.
Note: For additional settings that may appear on your camera but I haven’t listed below, leave them in their native/default value.
1. Shooting Settings
1a. Image Quality Settings
File Format: XAVC S 4K (If your camera offers XAVC HS 4K codec, you can also use it but only if your computer has a high-end graphics card, else you may have compatibility/performance issues while playing/editing the clips).
Recording Frame Rate: 50p (for ‘Slow Motion Mode’) or 25p (for ‘Regular Speed Mode’). If you live in the US/Japan and use NTSC video standard, use 60p (for ‘Slow Motion Mode’) or 24p (for ‘Regular Speed Mode’). Explained more in the ‘Camera Memory’ settings section below.
Record Setting: 200M 4:2:2 10bit (for XAVC S 4K 50p mode) or 140M 4:2:2 10bit (for XAVC S 4K 25p mode). Explained more in the ‘Camera Memory’ settings section below.
4K Angle of View Priority: On (removes crop factor from 50FPS onwards and disables NR processing)
APS-C S35 Shooting: Off
1b. Shooting Mode Settings
Exposure Ctrl Type: P/A/S/M Mode
1c. Audio Recording Settings
Audio Recording: On
Audio Recording Level: 3 (If you are using a lavalier or wireless microphone like Rode Wireless Go) and 15 (if you are using internal Camera Mic) – Check that max audio level is in -12dB area
Audio Out Timing: Lip Sync
Wind Noise Reduction: Off (Turn it on only when wind is there)
Audio Level Display: On
1d. Image Stabilization Settings
SteadyShot/Vibration Reduction/Image Stabilization: Standard or Active (higher stabilization but the frame will be slightly cropped). Switch off when setting the camera on tripod.
SteadyShot/Vibration Reduction/Image Stabilization Adjustment: Auto
1e. Zoom Settings
Zoom Range: Clear Image Zoom
1f. Shooting Display Settings
Emphasized Recording Display: On (Puts a red border around the screen while recording to indicate recording is on)
2. Exposure/Color Settings
2a. Exposure Settings
Auto Slow Shutter: Off
2b. White Balance Settings
White Balance: Auto (You can always manipulate the White Balance in post-processing rather than adjusting in-camera) or set up a Manual one if you don’t want the camera to change the White Balance in the middle of shooting a clip based on ambient lighting changes (You can use the preset WBs or use 5000 to 6000 Kelvin manually)
Priority Setting in Auto White Balance (AWB): Standard
Shockless WB: 3 (Slow). This setting tells the camera to automatically change the White Balance during movie shooting but slowly.
2e. Color/Tone Settings
Picture Profile: (Explained more in the ‘Camera Memory’ settings section below)
3. Focus Settings
3a. Autofocus/Manual Focus Settings
Focus Mode: Continuous AF (AF-C)
AF Transition Speed: 5 (This is the speed at which the AF does focus transition from one subject to another)
AF Subject Shift Sensitivity: 5 (Responsive) if you want the camera to change AF to the nearest subject or 1 (Locked on) if you want the camera to lock focus on a specific subject
3b. Focus Area Settings
Focus Area: Wide
3c. Focus Assistant Settings
Focus Magnification Time: No Limit
Initial Focus Magnification: x4.0
4. Setup
4a. Area/Date Settings
NTSC/PAL Selector: Back when television was analog, different formats determined how a picture appeared on the television screen. Even today in the modern era of screen formatting, the abbreviations of those formats viz. NTSC (National Television Standards Committee) and PAL (Phase Alternate Lines) are still applicable. These are two different color encoding systems that impact the visual quality of content viewed on analog or digital screens. NTSC (more popular in areas like the US and Japan) delivers 30 FPS (Frames Per Second) at an aspect ratio of 720x480 while PAL (more prevalent in Europe, the UK, and Australia) delivers a frame rate of 25 FPS at an aspect ratio of 720x576. So if you live in Europe like me, select PAL (the camera comes in PAL by default if you purchase it in Europe), and if you live in the US/Japan select NTSC (explained more in the ‘Camera Memory’ settings section below)
4b. Operation Customize Settings
Movie Custom Key/Dial Settings:
AEL (Rear of the Camera): Follow Shooting Custom Key/Dial Setting
AF-ON (Rear of the Camera): Follow Shooting Custom Key/Dial Setting
C1 (Rear of the Camera): AWB Lock Hold (comes in handy when you are shooting a movie while moving amidst different color scenes and the white balance changes)
C3 (Rear of the Camera): Follow Shooting Custom Key/Dial Setting
C4 (Rear of the Camera): Follow Shooting Custom Key/Dial Setting
C2 (Top of the Camera): Follow Shooting Custom Key/Dial Setting
Function Menu Settings: The Function Menu button opens a customizable shortcut menu for your most used functionalities of the camera. I’ve added the following to my Function Menu -
Picture Profile (Explained more in the ‘Camera Memory’ settings section below)
White Balance
ISO
Exposure Compensation
Focus Mode
Focus Area
Subject Recognition in AF (I normally keep Subject Recognition in AF on but sometimes I may want to switch it off if for instance I’m trying to focus on a monument and the camera starts focusing on someone else’s face in the background or an accidental passerby’s face in the foreground)
Recognition Target
Silent Mode
Variable Shutter
SteadyShot
Audio Recording Level
Movie Display (Screen Display) Settings:
Monitor:
Check ‘No Display Info’ with Exposure: On
Check ‘Histogram’
I keep all other options unchecked
Finder:
Check ‘No Display Info’ with Exposure: On
Check ‘Histogram’ with Exposure: On
I keep all other options unchecked
Recording with Shutter: On (Enables recording by full pressing shutter button in Movie mode)
4c. Sound Option Settings
4ch Audio Monitoring: CH1/CH2
Basic ‘Variable’ Camera Settings for Videography
1. Understand the ‘Exposure Triangle’
Before we get into the settings of your camera that you need to ‘vary’ based on shooting conditions, let’s begin with understanding a few basics of optics. First, let’s understand the most important concept of photography/videography - the ‘Exposure Triangle’ and how to control that using your camera settings. ‘Exposure Traingle’ is a term given to the three parameters that collectively determine the optimal exposure or, in other words, the right amount of brightness in your image. These three factors are Aperture (A), Shutter Speed (S), and ISO, which you may have seen mentioned in the EXIF info (settings that were used to take the shot) below an image. They are depicted as three sides of a triangle, since like in a triangle if you change the length of one of the sides, the length of the other two sides need to be adjusted to complete the triangle, similarly if one of these parameters change, we need to compensate by adjusting the other two parameters to obtain an optimal exposure.
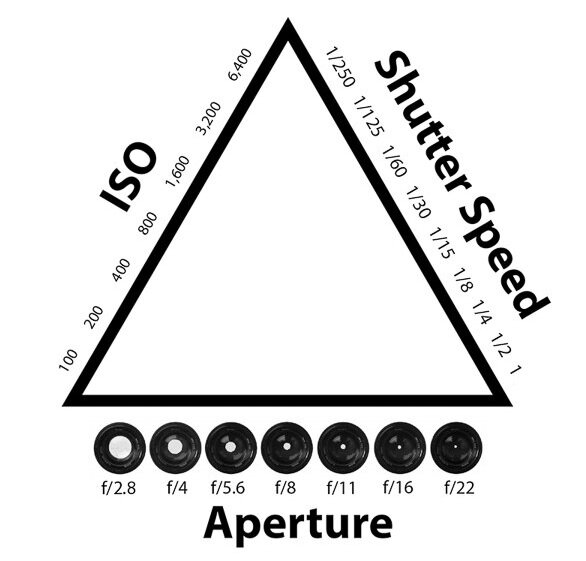
2. Choose the right Aperture (F-Number) to control the ‘Depth of Field (DOF)’
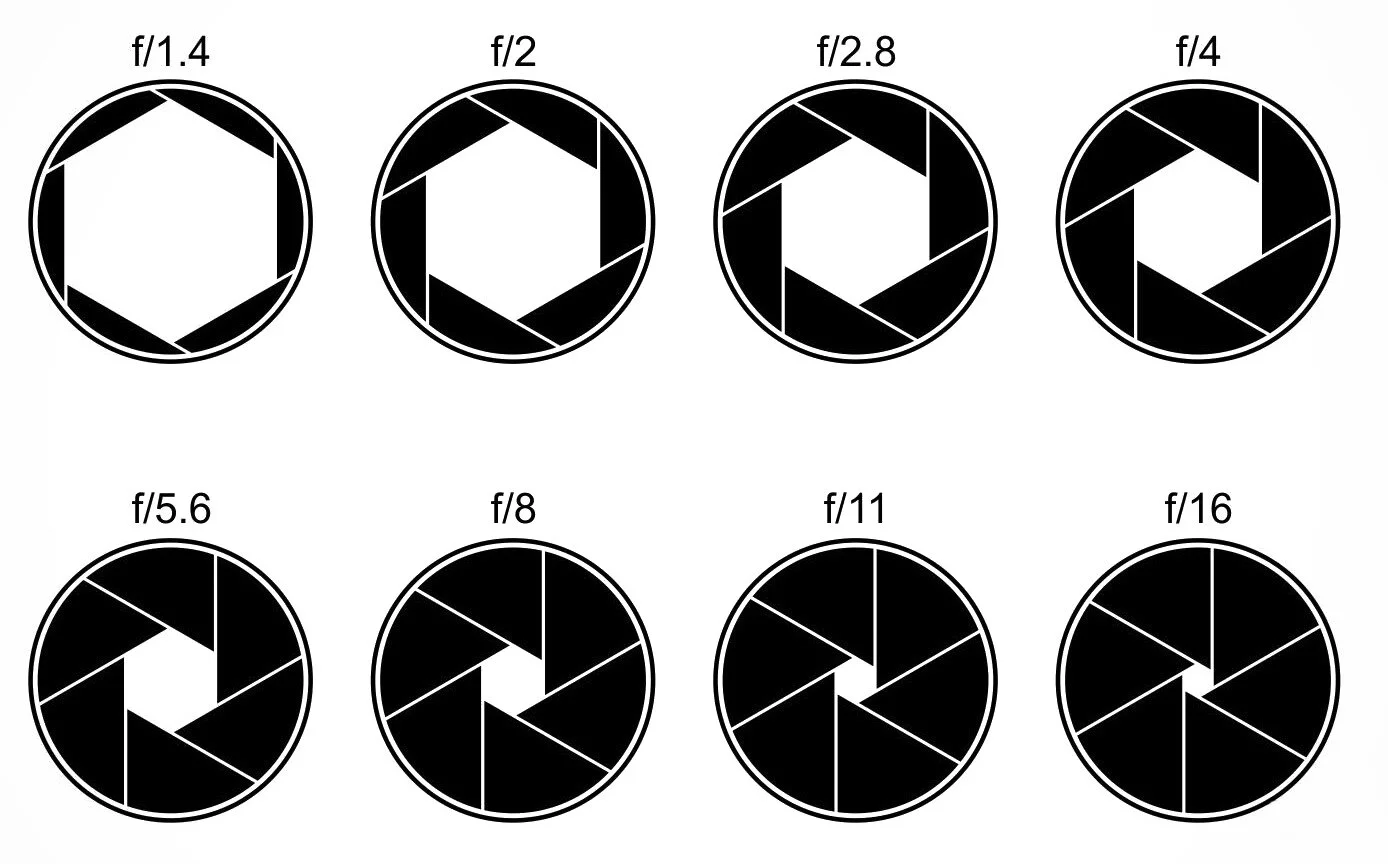
The aperture is the small hole in the lens through which the light enters. It is represented by an F-number that indicates how much light the lens lets through to the sensor. Every time you increase or decrease the aperture by changing the F-number, the light entering the camera will increase or decrease by ‘1 F-Stop’ commonly just called ‘1 Stop',’ a jargon used by the photography/videography industry to describe the amount of light entering the camera. Remember, the smaller the F-number, the larger is the aperture, and the lesser is the depth of field, which means only the focal plane (the plane where you’ve focused) will appear sharp, and the background will be blurred, which is also known as bokeh. And the larger the F-number, the smaller is the aperture, and the greater is the depth of field, which means the whole frame (from foreground to background) will appear sharp.
Note: 1 F-Stop equals 1 EV (Exposure Value), which I will explain later in this article under ‘Exposure Compensation.’
When you are shooting a video, if you select one of the 2 modes ‘Regular Speed Mode (4K 24 FPS)’ or ‘Slow Motion in Normal Light Mode (HD 120 FPS)’ using the ‘Memory Recall’ saved settings slots, start with the biggest aperture possible (smallest F-number). If the image is too bright, decrease the aperture until the ‘Exposure Compensation’ shows ‘0’ i.e. the video is optimally exposed. If you select the mode ‘Slow Motion in Low Light Mode (HD 120 FPS),’ set the biggest aperture possible (smallest F-number) to let as much light in as possible to compensate for the low light conditions, and let the camera set the right ISO to attain optimum exposure. Explained more in the ‘Camera Memory’ settings section below.
3. Choose the right ISO to control the ‘Light Sensitivity’
ISO represents your camera’s sensitivity to light with lower values corresponding to lower sensitivity and higher values corresponding to higher sensitivity. In other words, in low-light shooting situations, as the video gets darker (even after you have used the largest aperture to let the maximum light in), you need to notch up the ISO value of your camera to make the video brighter. But please bear in mind that the camera does this by artificially illuminating the sensor’s pixels, and hence they appear in the video as noise/grains. So unless extremely necessary (like for low-light situations), I recommend against increasing the ISO. For all other normal light situations, always keep the ISO to the lowest value (ISO 125 is the lowest value for ‘Cine4’ Gamma that we’re using).
Note: The noise can later be reduced in post-processing applications like DaVinci Resolve Studio or Adobe Premiere Pro, but in most cases, it does it at the cost of compromising with video sharpness and details. So it is best to try not to introduce noise in the video in the first place.
4. Save the different Settings (Slow Motion in Normal Light Mode (HD 120 FPS), Slow Motion in Low Light Mode (HD 120 FPS), and Regular Speed Mode (4K 24 FPS) in ‘Camera Memory’ and ‘Recall’ when needed)
I normally shoot videos in 3 different modes (for which you need to use 3 different sets of settings) namely ‘Slow Motion in Normal Light Mode (HD 120 FPS),’ ‘Slow Motion in Low Light Mode (HD 120 FPS),’ and ‘Regular Speed Mode (4K 24 FPS).’ The third one I use as-is (24 FPS) for regular speed clips, and the first/second one I shoot in 120 FPS, and then convert to 24 FPS (I use 24 FPS as the ‘Timeline Frame Rate’ on DaVinci Resolve Studio and hence every clip on the timeline automatically gets converted to 24 FPS) to slow it down.
To save these sets of settings, first do the following settings in your camera, and then save/register the settings by going to Shooting Mode Settings -> Camera Settings Memory -> Slots 1, 2, or 3. After you have saved it in your preferred slot, whenever you want to use these settings, turn the dial to that specific slot number (as shown below) to recall/load the settings from the camera memory.

1. Slow Motion in Normal Light Mode (4K 50 FPS) Settings
Go to ‘Manual Priority Mode’ on the Dial and change these Camera Settings -
File Format: XAVC S 4K
Recording Frame Rate: 50p
Record Setting: 200M 4:2:2 10bit
Shutter Speed: 1/(2*FPS) = 1/ (2*50) = 1/100
Aperture: 2.8
ISO: 125
Focus Mode: AF-C
Focus Area: Wide
Focus Point: Center of Screen
Subject Recognition in AF: On
Picture Profile: PP6 -
Black Level = +2
Gamma = Cine4
Black Gamma = (Range = Wide, Level = +4)
Knee = (Mode = Manual, Manual Set = (Point = 80%, Slope = +2))
Color Mode = Pro
Saturation = -5
Color Phase = 0
Color Depth = (R = +3, G = +1, B = -1, C = -4, M = -4, Y = +3)
Detail = -6
2. Slow Motion in Low Light Mode (4K 50 FPS) Settings
Go to ‘Manual Priority Mode’ on the Dial and change these Camera Settings -
File Format: XAVC S 4K (Same as above)
Recording Frame Rate: 50p (Same as above)
Record Setting: 200M 4:2:2 10bit (Same as above)
Shutter Speed: 1/(2*FPS) = 1/ (2*50) = 1/100 (Same as above)
Aperture: 2.8 (Same as above)
ISO: 1600 (This is the only value that is different from the above)
Focus Mode: AF-C (Same as above)
Focus Area: Wide (Same as above)
Focus Point: Center of Screen (Same as above)
Subject Recognition in AF: On (Same as above)
Picture Profile: PP6 (Same as above)
3. Regular Speed Mode (4K 25 FPS) Settings
Go to ‘Manual Priority Mode’ on the Dial and change these Camera Settings -
File Format: XAVC S 4K
Recording Frame Rate: 25p
Record Setting: 140M 4:2:2 10bit
Shutter Speed = 1/(2*FPS) = 1/ (2*24) ~ 1/50
Aperture: 2.8 (Same as above)
ISO: 125
Focus Mode: AF-C (Same as above)
Focus Area: Wide (Same as above)
Focus Point: Center of Screen
Subject Recognition in AF: On (Same as above)
Picture Profile -> PP6 (Same as above)
5. Save the Settings Configurations in your Memory Card
Go to Menu -> Setup -> Reset/Save Settings -> Save/Load Settings -> Save
Epilogue
So that was the ultimate guide to the best camera settings for video shooting. Please let us know in the comments below if you enjoyed reading this article and if it helped in some way in your videography journey.
If you want to know the extensive list of basic camera settings that you must use to set up your camera for photography, I recommend you to read our article A Step-by-Step Beginner’s Guide to Master Basic Photography Camera Settings | Best Manual Camera Settings for Beginner Photographers. Additionally, if you want to fully transition from shooting in ‘Auto’ mode to ‘Manual’ mode, learn how to ‘Expose for the highlights,’ understand the histogram, and learn the composition rules, I recommend you to read our article A Step-by-Step Beginner’s Guide to Master Manual Mode Photography | Manual Mode Photography Tutorial | 14 Ultimate Tips and Tricks for Shooting in Manual Mode. Until then, merry traveling and happy shooting!
Pin the article
Bookmark the article for reading later!

Want to license/buy photos in the article?
License photos for commercial/editorial use or buy photo prints!
Want us to write an article for you?
Articles for magazines, newspapers, and websites!
Watch our Videos
Check out our videos on our Youtube Channel!
Join the Newsletter
Get updates on our latest articles!
We respect your privacy. Read our policy here.