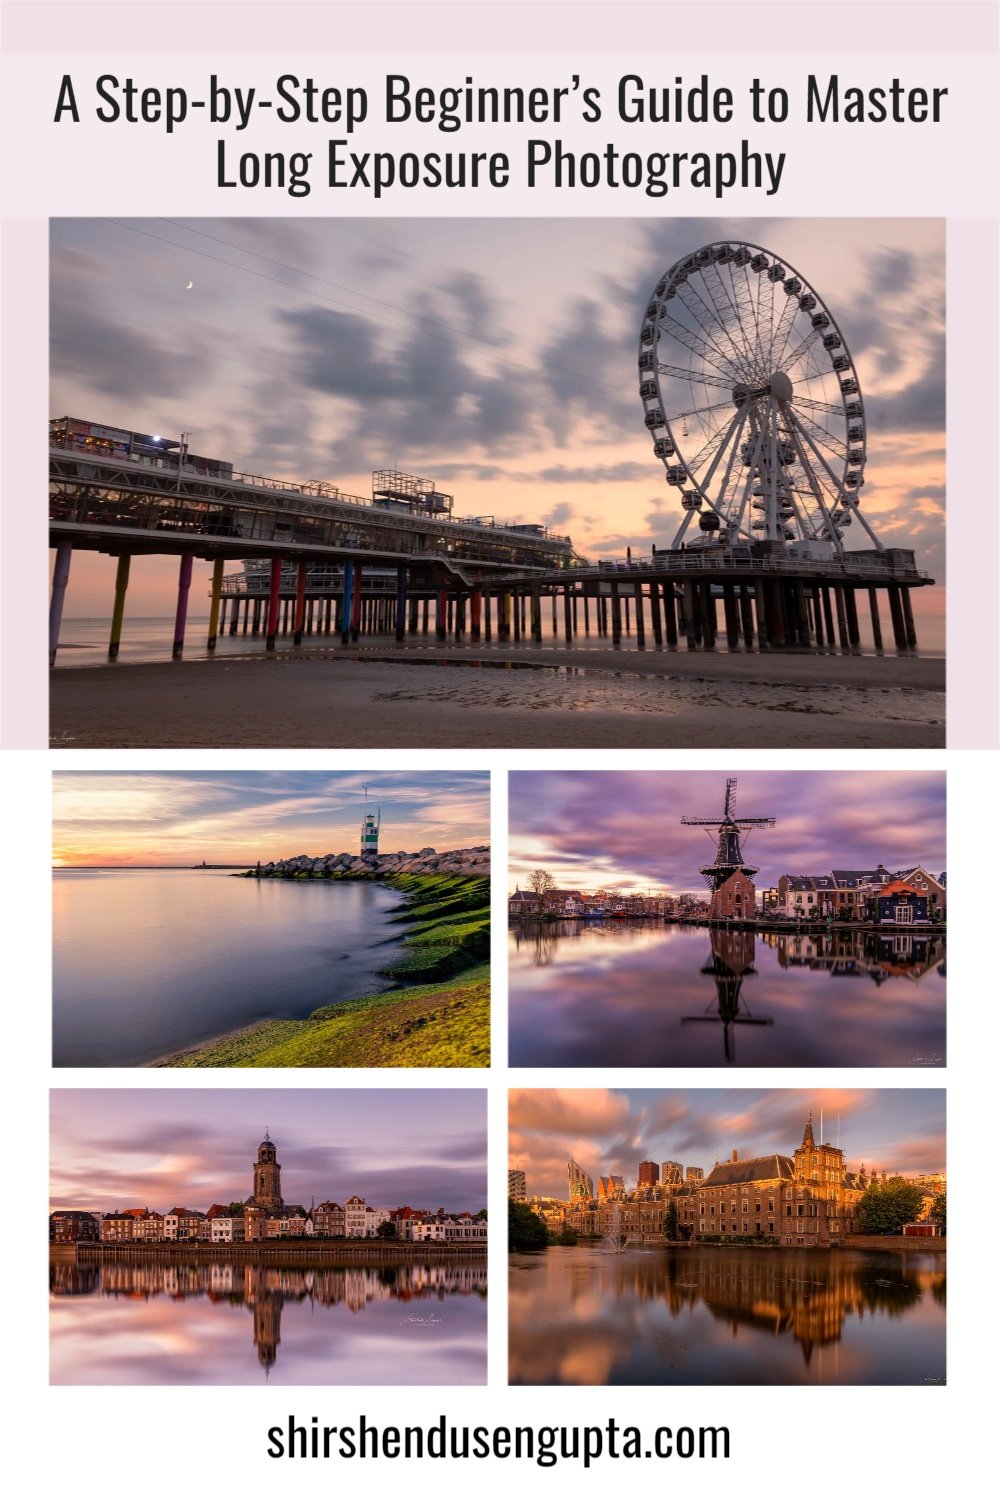
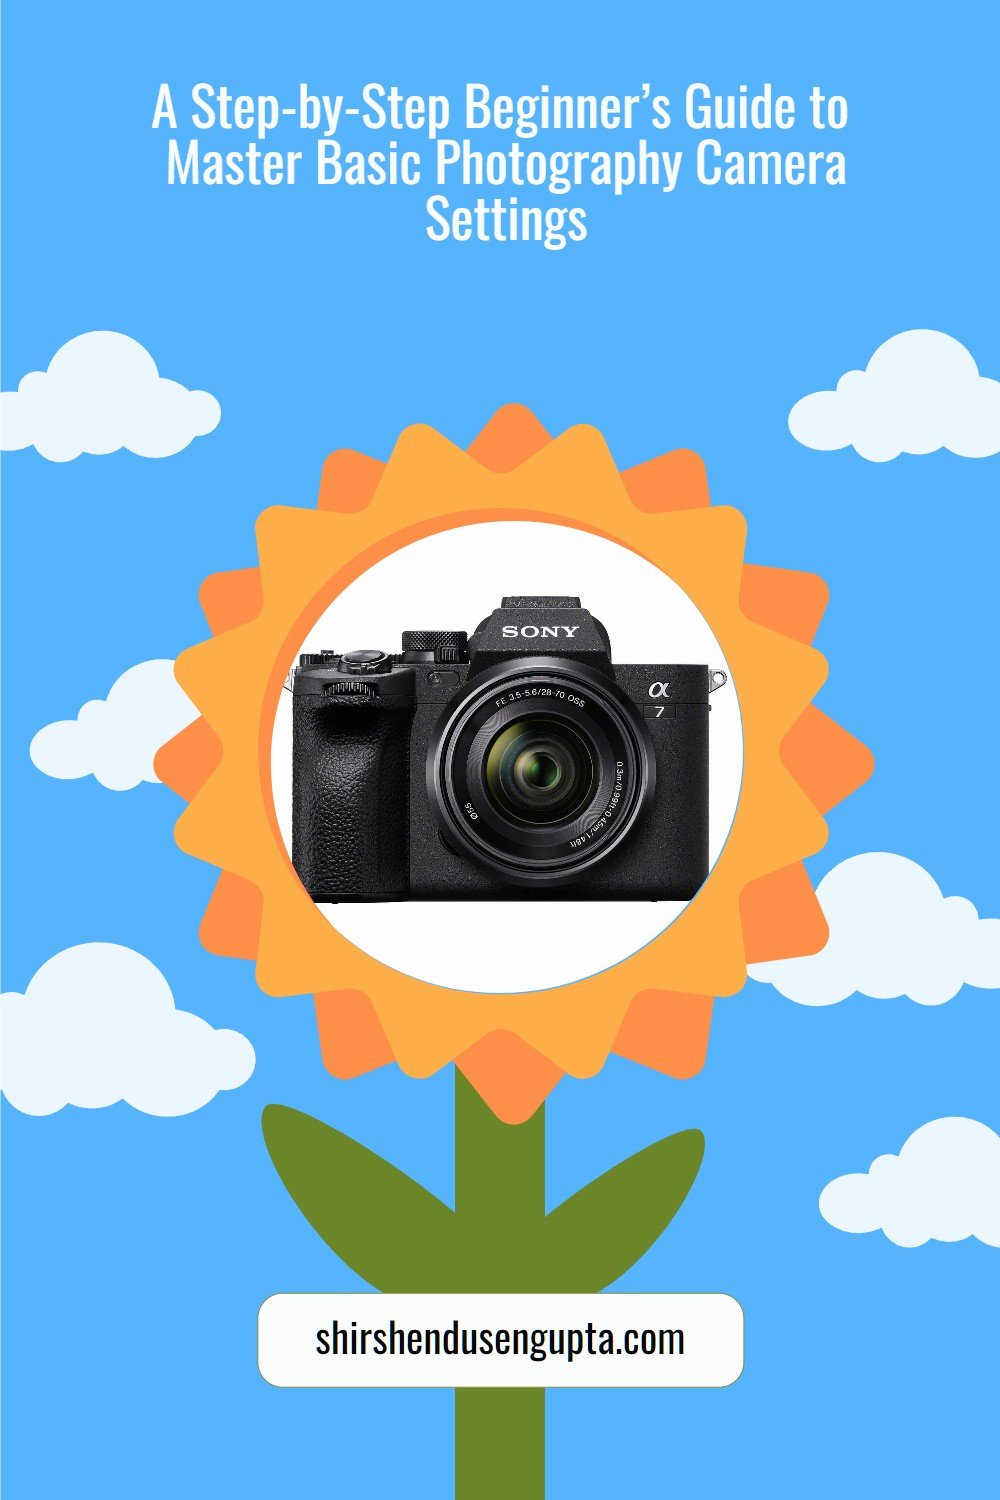
A Step-by-Step Beginner’s Guide to Master Basic Photography Camera Settings | Best Manual Camera Settings for Beginner Photographers

Camera Settings - An Enigma for a Beginner Photographer
Every day, we get questions from our readers about the camera settings we use for photography which can be leveraged as a standard across any camera model. As a matter of fact, we do have an extensive set of ‘fixed’ settings that you can set up once and for all and forget about them since they are not dependent on the shooting conditions. Additionally, there are a set of ‘variable’ settings that you need to change on the fly according to shooting conditions. We arrived at these after a lot of trial and error and are more or less applicable to almost all brands of cameras available in the market. Today, I’m here to share them with you!
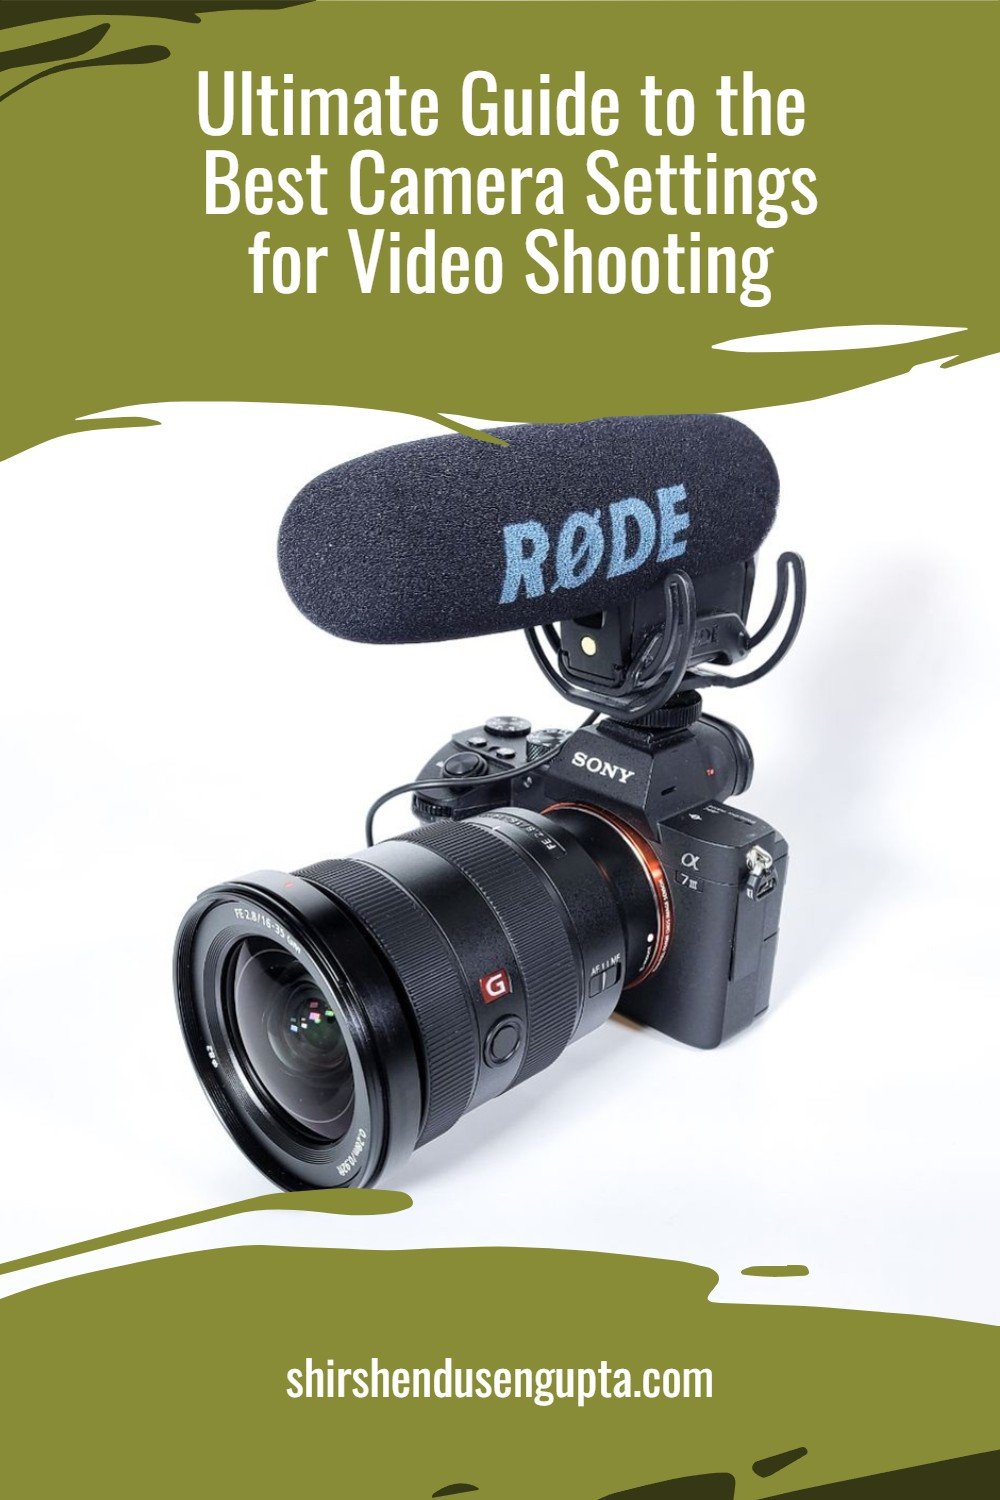
If you want to master the best camera settings for videography, please read our article Ultimate Guide to the Best Camera Settings for Video Shooting. And if you are already through with setting up your camera, but want to hone your photography skills by moving from shooting in ‘Auto’ mode to ‘Manual’ mode, I recommend you to read our article A Step-by-Step Beginner’s Guide to Master Manual Mode Photography | Manual Mode Photography Tutorial | 14 Ultimate Tips and Tricks for Shooting in Manual Mode.
Basic ‘Fixed’ Camera Settings for Photography
Let's start by going through some camera settings that should be applicable to any contemporary digital camera. Since the following settings are essentially the same for all brands and types of cameras, you should be able to find them under the settings menu of your camera. I'm providing them in the order they appear on my Sony camera.
Note: For additional settings that may appear on your camera but I haven’t listed below, leave them in their native/default value.
1. Shooting Settings
1a. Image Quality Settings
File Format: RAW (To know more about why and how to shoot RAW, please read our article A Step-by-Step Beginner’s Guide to Master Manual Mode Photography | Manual Mode Photography Tutorial | 14 Ultimate Tips and Tricks for Shooting in Manual Mode)
RAW File Type: Lossless Comp
JPEG Quality: Extra Fine (Only if you’ve selected ‘File Format’ as ‘RAW & JPEG’ or ‘JPEG’ above)
JPEG Image Size: L: 33M (Only if you’ve selected ‘File Format’ as ‘RAW & JPEG’ or ‘JPEG’ above)
Aspect Ratio: 3:2
Long Exposure NR (Noise Reduction): Off (If long exposure images yield noise, you can always remove them in a much better way in post-processing rather than doing in-camera which takes more time to save the image and produces worse results)
High ISO NR (Noise Reduction): Off (If high ISO images yield noise, you can always remove them in a much better way in post-processing rather than doing in-camera which takes more time to save the image and produces worse results)
HLG (Hybrid Log-Gamma Standard) Still Image: Off (only needed for HDR shooting, saved in HEIF format, not allowed in RAW)
Color Space: sRGB
(Lens) Shading/Vignetting Compensation: Off (You can do a much better (lens) shading/vignetting compensation in post-processing rather than doing in-camera which takes more time to save the image and produces worse results)
(Lens) Chromatic Aberration Compensation: Off (You can do a much better (lens) chromatic aberration compensation in post-processing rather than doing in-camera which takes more time to save the image and produces worse results)
(Lens) Distortion Compensation: Off (You can do a much better (lens) distortion compensation in post-processing rather than doing in-camera which takes more time to save the image and produces worse results)
1b. Media Settings
Recording Media (Image): Simultaneous (if you want to record your photos on both memory cards for redundancy)
Recording Media (Video): Simultaneous (if you want to record your videos on both memory cards for redundancy)
Auto Switch Media: On (Prioritizes recording on the memory card in Slot 2 when the memory card in Slot 1 is full)
1c. File Settings
Write Copyright Info: On
Set Photographer Name: Enter your name in there
Set Copyright Holder Name: Enter your name in there
1d. Shooting Mode Settings
Camera Setting Memory: As explained in ‘Save different Settings’ section below.
1e. Drive Mode Settings
Drive Mode: Continuous Shooting - Hi+ (Especially for moving subjects. Explained more in the ‘variable’ camera settings section below)
Pre-Capture: On (Works only when you use Electronic Shutter)
Pre-Capture Recording Time: 1 second (the higher the number, the more it eats up the buffer, which effectively means you will get fewer burst shots until you hit the buffer)
Pre-Capture Start Trigger: Both Valid
1f. Shutter/Silent Settings
Silent Mode Settings:
Silent Mode: Off (Switching it on will engage the electronic shutter rather than the mechanical shutter. Use it when you need to shoot silently like in a church, but beware that it may produce horizontal stripes also known as banding effect in the presence of LED lights)
Target Function Settings:
Aperture Drive in AF: Not Target
Shutter When Power Off: Not Target
Auto Pixel Mapping: Not Target
Shutter Type: Mechanical Shutter
e-Front Curtain Shutter: Off (Switching on enables faster shooting speed but may distort bokehs)
Shoot Start Display: Off
Release without Lens: Disable
Release without Card: Disable
Anti-Flicker Shooting: On (Tells the camera to shoot at a timing there is low impact on the exposure and color during flickering)
Variable Shutter: Off (Switch it on only when you have flickering lights; works only in Manual Priority Mode)
Variable Shutter Settings: Enter a shutter value using the shutter wheel that compensates for the flicker (If the Variable Shutter is On this setting will be enabled)
1g. Image Stabilization Settings
SteadyShot/Vibration Reduction/Image Stabilization: On (only switch off when setting the camera on tripod)
SteadyShot/Vibration Reduction/Image Stabilization Adjustment: Auto
1h. Shooting Display Settings
Grid Line Display: On
Grid Line Type: Rule of 3rds Grid
Live View Display Settings:
Live View Display: Setting Effect On (reflects settings like Exposure Compensation in the viewfinder and LCD Monitor)
Exposure Effect: Exposure Setting and Flash (reflects the effect of exposure for shooting with flash on the in viewfinder and LCD Monitor)
Frame Rate Low Limit: Off (Limits the Live View frame rate to low speed)
2. Exposure/Color Settings
2a. Exposure Settings
ISO: 100 (Increase when the shutter speed gets too low due to low light. Explained more in the ‘variable’ camera settings section below)
ISO Range Limit: 50-204800
ISO Auto Minimum Shutter Speed: 1/500 (Tells the camera to adjust the ISO (only if ‘ISO: Auto’ is selected) in such a way that the given minimum shutter speed value is maintained)
2b. Exposure Compensation Settings
Exposure Compensation: 0.0 (Adjust according to availability of light. Explained more in the ‘variable’ camera settings section below)
Exposure Step: 0.3 EV
2c. Metering Settings
Metering Mode: Matrix/Multi (While your camera may have a variety of metering modes, including spot metering, center-weighted metering, and matrix/multi/evaluative metering, it is usually best to use matrix/multi/evaluative metering by default because it considers the entire scene and typically exposes your subjects more accurately
Face Priority in Multi Metering: On (Automatically turns off if you set Subject Recognition in AF to On in ‘Focus Settings’ below)
AEL with Shutter: Off (With Auto-Exposure Lock with Shutter set to Off, exposure is not locked when you half-press the shutter. In situations like shooting a panorama, where you want consistent exposure across all frames, you need to hold the AEL button to lock exposure while you recompose and shoot)
2d. White Balance Settings
White Balance: Auto (You can always manipulate the White Balance in post-processing rather than adjusting in-camera)
Priority Setting in Auto White Balance (AWB): Standard
Shutter AWB Lock: Shutter Half Press
WB Capture Frame Size: Large
2e. Color/Tone Settings
Dynamic Range Optimizer (DRO)/Active D-Lighting/Auto HDR: Off (You can always open up shadows in post-processing rather than doing in-camera)
Creative Style/Picture Control/Picture Style/Film Simulation: Standard
2f. Zebra Display Settings
Zebra Display: On (Shows stripes in blown-out/overexposed areas in the viewfinder that helps you to adjust exposure)
Zebra Level: Custom 2; Lower Limit: 105+
3. Focus Settings
3a. Autofocus/Manual Focus Settings
Focus Mode: Single-Shot AF (AF-S) for static subjects or Continuous AF (AF-C) for moving subjects (Explained more in the ‘variable’ camera settings section below)
Priority Set in AF-S: Balanced Emphasis
Priority Set in AF-C: Balanced Emphasis
AF Tracking Sensitivity/AF Level for Crossing: 1 (Locked on)
AF Tracking for Speed Change: Standard
AF Illuminator: Auto (Will point a beam of light on the subject for better focusing only in low-light situations)
Aperture Drive in AF: Standard
AF with Shutter: Off (Since I use ‘back button focusing’ instead of half-pressing the shutter button to focus. I’ve explained it further in the ‘Custom Key/Dial Settings’ below)
Full Time DMF: Off
Pre-AF: Off (This is a functionality that tells the camera to keep focusing on random objects based on its own understanding even before you manually point on the desired object and press the focus button i.e. half-press the shutter button or press the ‘back button’ you have assigned for focusing)
3b. Focus Area Settings
Focus Area: Flexible Spot/Expand Spot for static subjects or Tracking: Expand Spot or Wide for moving subjects (Explained more in the ‘variable’ camera settings section below)
Switch V/H AF Area: AF Point + AF Area
Area Display During Tracking: On (Will display the focus area frame during autofocus while the ‘Focus Area’ is set to ‘Tracking’)
AF-C Area Display: On (Will display the continuous autofocus area)
Phase Detect Area: On
Circulation of Focus Point: Circulate
AF Frame Move Amt: Standard
3c. Subject Recognition Settings
Subject Recognition in AF: Off (This is a functionality that tells the camera to prioritize the focus on an automatically recognized subject. I normally keep it off since sometimes it recognizes random subjects like a passerby and prioritizes focusing on it while I’m trying to focus on something else, which can be very intrusive. Instead, I trigger the subject recognition at will using a custom button. Explained more in the ‘Custom Key/Dial Settings’ below)
Recognition Target: Auto (it automatically selects a recognition target among human, animal, bird, insect, car/train, and airplane)
Right/Left Eye Selection: Auto
Subject Recognition Frame Display: On
3c. Focus Assistant Settings
Auto Magnifier in MF (Manual Focus): On (Magnifier automatically turns on to assist tack sharp manual focusing)
Focus Magnification Time: No Limit
Initial Focus Magnification: x5.5
AF in Focus Magnification: On (Enables the camera to perform high-precision Autofocus in Magnifier)
3d. Peaking Display Settings
Peaking Display: On
Peaking Level: Mid
Peaking Color: White
4. Playback Settings
4a. Playback Target Settings
Playback Settings of Multi Media: Slot 1
Display Settings of Multi Media: Follow Playback Settings
4b. Magnification Settings
Enlarge Initial Magnification: Standard
Enlarge Initial Position: Focused Position
4c. Playback Option Settings
Display as Group: Off (Displays images shot in burst mode or inaterval shooting in a group)
Display Rotation: Off
Focus Frame Display: Off
5. Network Settings
5a. Connection/Remote Shooting Settings
Smartphone Connection: Select ‘Connect via Bluetooth’ option on the camera, download the Sony Creator’s App from Apple App Store or Google Play Store on your smartphone, and follow the on-screen instructions to connect to the camera (useful for remote shooting in case you forgot your cable release for shooting long exposures, for instance)
Remote Shoot Setting:
Still Image Save Destination: Camera Only
Save Image Size: Original
Save JPEG Size: Large Size
5b. Network Streaming Settings
Output Image Quality Settings: Standard
Movie Recording During Streaming: Enable
5c. USB Streaming Settings
Resolution/Frame Rate: HD (1080p) 25p (Since most devices are incapable of streaming 4K videos)
Movie Recording During Streaming: Enable
6. Setup
6a. Area/Date Settings
Language: English
Area/Date/Time Settings: Select the appropriate area, daylight saving, date, date format, and time according to your location
6b. Operation Customize Settings
Still Custom Key/Dial Settings:
AEL (Rear of the Camera): AEL Hold (In situations like shooting a panorama, where you want consistent exposure across all frames, you need to hold the AEL button to lock exposure while you recompose and shoot)
AF-ON (Rear of the Camera): AF On (This way you assign a custom button at the back of the camera also known as ‘back button focusing’ to engage focus instead of half-pressing the shutter button for that purpose as mentioned in the ‘Autofocus/Manual Focus Settings’ above. It is helpful in three circumstances - First while setting your focus and then experimenting with different compositions without having to worry about refocusing every time you release the shutter, second while adjusting the focus just once in low-light and low-contrast circumstances without the AF "focus hunting" every time the shutter is half-pressed, and third while focusing just once before screwing on the dark neutral density filters, while doing long exposure photography, without worrying about the AF "focus hunting" after the dark glasses are put on every time the shutter is half-pressed for taking the shot. To know more about long exposure photography, please read our article, A Step-by-Step Beginner’s Guide to Master Long Exposure Photography | Long Exposure Photography Tutorial | 30 Ultimate Tips and Tricks for Long Exposure Photography.)
C1 (Rear of the Camera): Subject Recognition AF (This way you assign a custom button to trigger Subject Recognition Priority in Autofocus as mentioned in the ‘Subject Recognition Settings’ above)
C3 (Rear of the Camera): AF/MF Selector Toggle (To switch between Autofocus and Manual Focus modes)
C4 (Rear of the Camera): Monitor Brightness
C2 (Top of the Camera): Focus Magnifier
Function Menu Settings: The Function Menu button opens a customizable shortcut menu for your most used functionalities of the camera. I’ve added the following to my Function Menu -
Picture Profile (I mainly use Picture Profiles for videography. To know more on how to set it up for videography, please read our article Ultimate Guide to the Best Camera Settings for Video Shooting)
White Balance
ISO
Exposure Compensation
Focus Mode
Focus Area
Subject Recognition in AF
Recognition Target
Silent Mode
Variable Shutter
SteadyShot
Drive Mode
Still Display (Screen Display) Settings:
Monitor:
Check ‘No Display Info’ with Exposure: On
Check ‘Histogram’
I keep all other options unchecked
Finder:
Check ‘No Display Info’ with Exposure: On
Check ‘Histogram’ with Exposure: On
I keep all other options unchecked
Different Settings for Still/Movie: Check all (I like to have my photography and videography settings independent of each other. Meaning, if I am shooting an image at ISO 800, does not mean I want to use the same ISO when I’m switching to video mode. So, to keep the settings independent of each other, check all the parameters i.e. Aperture, Shutter Speed, ISO, Exposure Compensation, Metering Mode, White Balance, Picture Profile, and Focus Mode. Then the camera will remember what settings you last used for each of the photography and videography modes and will retain them when you switch between the two)
6c. Touch Operation Settings
Touch Operation: On
Touch Panel/Pad: Both Valid
Touch Panel (Monitor) Settings:
Shooting Screen:
Touch Function in Shooting: Touch Tracking (If you enable this, you can start tracking a moving subject by simple tapping on the subject on the LCD monitor even when you are in AF-S mode. Explained more in ‘Continuous AF’ section below)
Playback Screen: On
Menu Screen: On
Touch Pad (when you touch the monitor while viewing through the viewfinder) Settings:
Operation in Vertical Orientation: On
Touch Position Mode: Absolute Mode
Operation Area: Right Half (to avoid your nose triggering AF points accidentally)
Touch Sensitivity: Standard
6d. Display Option Settings
Remain Shoot Display: Always Display (Will display the buffer memory remaining while capturing in burst mode (Explained more in ‘Continuous AF’ section below)
Auto Review: Off (This setting allows you to choose the time for which the last image you captured will be displayed on the screen. I keep it off and when I want to review my images, I click on the playback button myself)
6e. Power Setting Option Settings
Monitor Low Brightness: 10 Sec
Monitor Off: Does not turn OFF
Power Save: 1 Min
Power Save by Monitor: Both Linked (This setting tells the camera to enter Power Save mode when closing the retractable LCD monitor inwards and return from Power Save Mode when opened)
Auto Power OFF temperature: High (Keep it high if you want to take longer videos, else the camera will shut down if it’s just a little hot)
6f. Sound Option Settings
Volume Settings: 15
Audio Signals: On:all
Audio Signal Volume: 3
6g. USB Settings
USB Connection Mode (PORT 1): Remote Shoot/Transfer
USB Connection Mode (PORT 2): Remote Shoot/Transfer
USB LAN/Tethering Connection: Port 1
USB LUN Setting: Multi
USB Power Supply: Off
6h. External Output Settings
HDMI Resolution: Auto
HDMI Info Display: Off (This setting displays on-screen info on the TV while connected to a TV via HDMI cable. Better to keep this off, else if you are recording while displaying on TV, the video also captures the on-screen display)
6i. Setup Option Settings
Video Light Mode: Auto
Shutter When Power OFF: Off (To reduce wear on shutter mechanism)
Auto Pixel Mapping: On (Pixel mapping is a firmware feature to ensure that you don’t see any incorrect/dead pixels in your photographs even though they are still there)
Basic ‘Variable’ Camera Settings for Photography
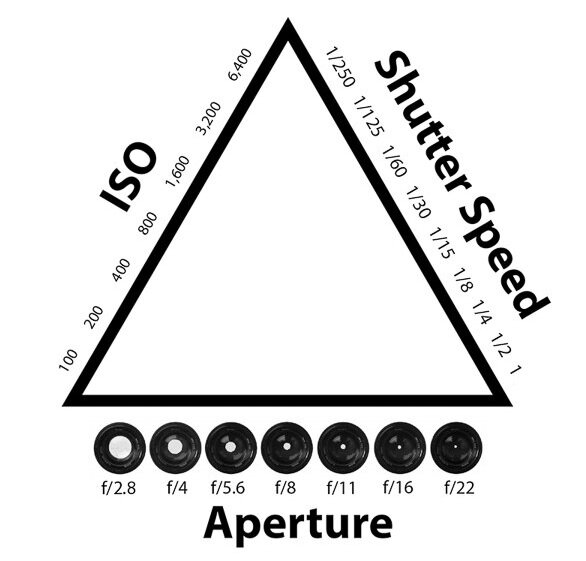
1. Understand the ‘Exposure Triangle’
Before we get into the settings of your camera that you need to ‘vary’ based on shooting conditions, let’s begin with understanding a few basics of optics. First, let’s understand the most important concept of photography - the ‘Exposure Triangle’ and how to control that using your camera settings. ‘Exposure Traingle’ is a term given to the three parameters that collectively determine the optimal exposure or, in other words, the right amount of brightness in your image. These three factors are Aperture (A), Shutter Speed (S), and ISO, which you may have seen mentioned in the EXIF info (settings that were used to take the shot) below an image. They are depicted as three sides of a triangle, since like in a triangle if you change the length of one of the sides, the length of the other two sides need to be adjusted to complete the triangle, similarly if one of these parameters change, we need to compensate by adjusting the other two parameters to obtain an optimal exposure.
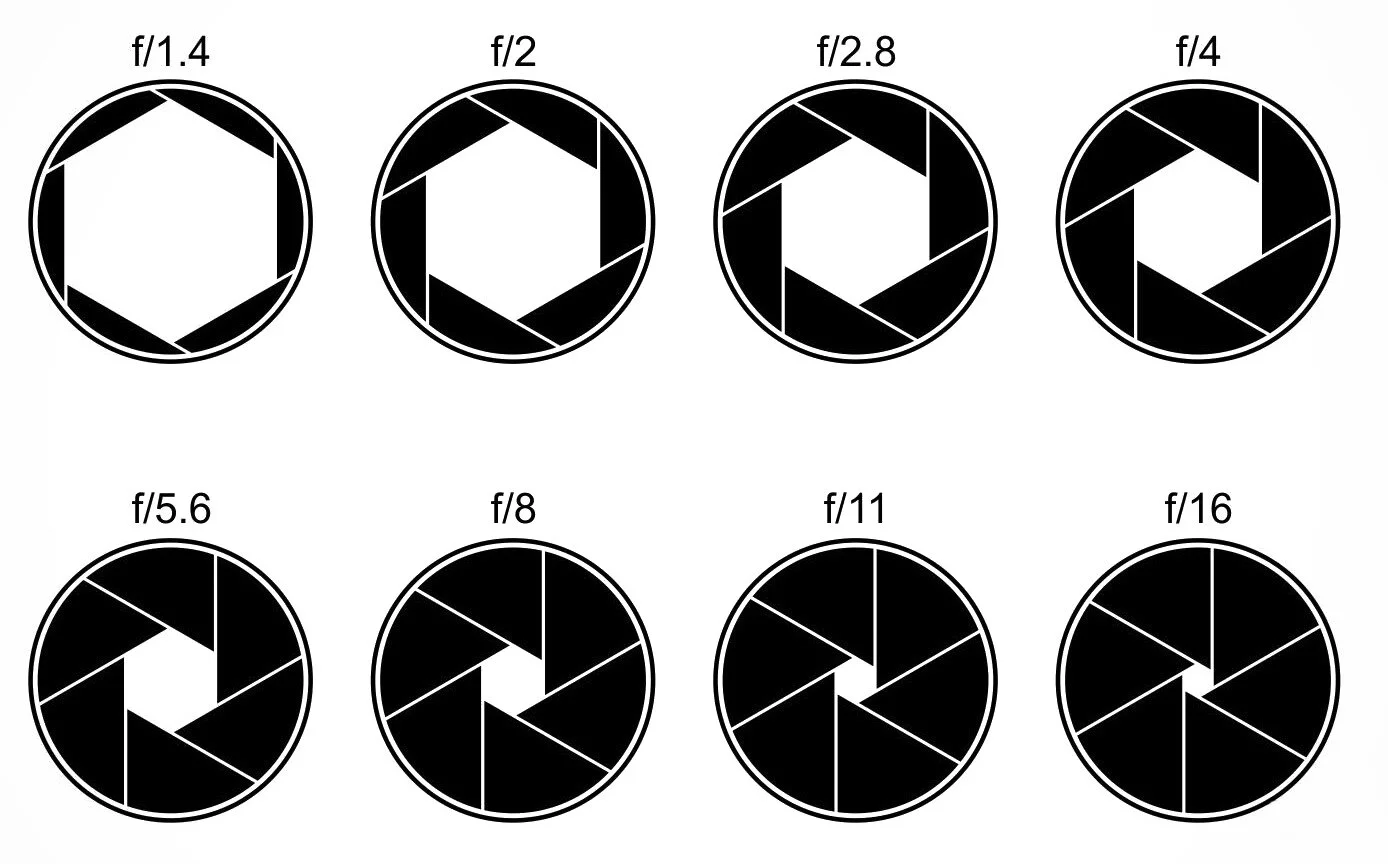
2. Choose the right Aperture (F-Number) to control the ‘Depth of Field (DOF)’
The aperture is the small hole in the lens through which the light enters. It is represented by an F-number that indicates how much light the lens lets through to the sensor. Every time you increase or decrease the aperture by changing the F-number, the light entering the camera will increase or decrease by ‘1 F-Stop’ commonly just called ‘1 Stop',’ a jargon used by the photography industry to describe the amount of light entering the camera. Remember, the smaller the F-number, the larger is the aperture, and the lesser is the depth of field, which means only the focal plane (the plane where you’ve focused) will appear sharp, and the background will be blurred, which is also known as bokeh. And the larger the F-number, the smaller is the aperture, and the greater is the depth of field, which means the whole frame (from foreground to background) will appear sharp.
Note: 1 F-Stop equals 1 EV (Exposure Value), which I will explain later in this article under ‘Exposure Compensation.’
So, if you are trying to take a portrait, still life, or macro shot and want the aesthetic background blur you’ve always seen in similar images of other photographers, notch down the aperture to the smallest F-number possible (meaning the largest aperture) like F1.8 or F3.5. Alternatively, if you are trying a landscape shot and want the whole frame to be in focus, try a bigger F-number (meaning smaller aperture) between F9 and F14. And if you want a starburst effect (the street lights appearing as stars), go for even smaller apertures like F16 or F18.
Note: But remember, for every lens, the sharpness of the images rises from the biggest aperture (lowest F-number), peaks somewhere between F9 and F11, and then gradually diminishes due to an optical phenomenon called diffraction (bending of light rays around sharp corners). So at the smallest aperture like F22, when the shutter blades close in front of the small hole, you may get a good starburst, but you will get a softer image due to the light loss owing to diffraction. So don’t use such a small aperture unless needed (for long exposure, for instance), as you can get a pretty good starburst effect with a sharp image even at F16. To know more about long exposure photography, please read our article A Step-by-Step Beginner’s Guide to Master Long Exposure Photography | Long Exposure Photography Tutorial | 30 Ultimate Tips and Tricks for Long Exposure Photography.
For this image, I used a large aperture to obtain low depth of field (EXIF: A - F3.5, S - 1/800 seconds, ISO - 100)
For this image, I used a small aperture to obtain high depth of field (EXIF: A - F11, S - 1/250 seconds, ISO - 100)
For this image, I used an even smaller aperture to get the starburst effect (EXIF: A - F18, S - 180 seconds, ISO - 100)
3. Choose the right Shutter Speed to obtain ‘Optimum Exposure’ or ‘Freeze Motion’
The shutter speed is the speed with which the shutter closes to capture the image. In other words, it determines for how long the sensor is exposed to the light entering the camera through the aperture of the lens. The faster the shutter speed, the darker and crisper the image with all motion frozen, and the slower the shutter speed, the brighter the image and more motion blur is captured. This also means that for slower shutter speeds, even a minute vibration of your hand will lead to blurry images, and hence for low shutter speed conditions, a tripod is customary. Slow shutter speeds are desired when you want to capture the motion of the clouds or waterfalls, known as long exposure photography. To know more about long exposure photography, please read our article A Step-by-Step Beginner’s Guide to Master Long Exposure Photography | Long Exposure Photography Tutorial | 30 Ultimate Tips and Tricks for Long Exposure Photography. Other than that, under normal handheld shooting circumstances, a fast shutter speed is desired.
For beginners, as a rule-of-thumb, set a shutter speed to the reciprocal of the maximum focal length of your lens, to begin with. That means, if you are using an 18-200 mm lens, use a shutter speed of 1/200, to begin with, and then adjust the speed based on the brightness or darkness of the output image. If the image is too bright, increase the shutter speed to expose the sensor to the light for less time to make the image darker (to 1/300 seconds, for instance), or if the image is too dark, decrease the shutter speed to expose the sensor to the light for more time to make the image brighter (to 1/100 seconds, for instance). During the initial days of your learning curve, it will be a trial and error. But with experience, you will just know what shutter speed to use under what conditions. But don’t worry, I will give you a cheat for that too. Wait for it!
For this image, I used fast shutter speed to freeze the motion of the birds (EXIF: A - F9, S - 1/800 seconds, ISO - 100)
For this image, I used slow shutter speed to capture the motion of the clouds and the water (EXIF: A - F9, S - 40 seconds, ISO - 100, ND filter - 10 Stop)
4. Choose the right ISO to control the ‘Light Sensitivity’
ISO represents your camera’s sensitivity to light with lower values corresponding to lower sensitivity and higher values corresponding to higher sensitivity. In other words, in low-light handheld shooting situations, if you observe the camera is slowing down the shutter speed to let in more light to compensate for the low light condition, and you’ve started getting blurry images due to hand vibrations, you need to notch up the ISO value of your camera to make it more sensitive to low light. This will increase the shutter speed and help you shoot a handheld optimally exposed image without hand vibrations. But please bear in mind that the camera does this by artificially illuminating the sensor’s pixels, and hence they appear in the image as noise/grains. So unless extremely necessary (like for low-light handheld situations), I recommend against increasing the ISO. It is best to have a tripod in a low light condition so that you don’t need to care about hand vibrations and hence don’t need to notch up the ISO. For all other normal light situations, always keep the ISO to the lowest value (ISO 50 or ISO 100, whichever is the lowest in your camera).
Note: The noise can later be reduced in post-processing applications like Adobe Lightroom, Adobe Camera RAW, Dfine (Nik Collection Tool), DXO PhotoLab, Skylum Luminar, or Topaz Labs DeNoise AI, but in most cases, it does it at the cost of compromising with image sharpness and details. So it is best to try not to introduce noise in the image in the first place. To know how to perform noise reduction in post-processing, please read my article My Step-By-Step Post-Processing Workflow | A Beginner’s Guide to RAW Photo Editing | Adobe Lightroom, Photoshop, and Nik Collection Tutorial.
For this image, I used high ISO for shooting in extremely dark situation handheld which introduced noise that I later reduced using Adobe Lightroom but it compromised the sharpness of the image (EXIF: A - F7, S - 1/20 seconds, ISO - 6000)
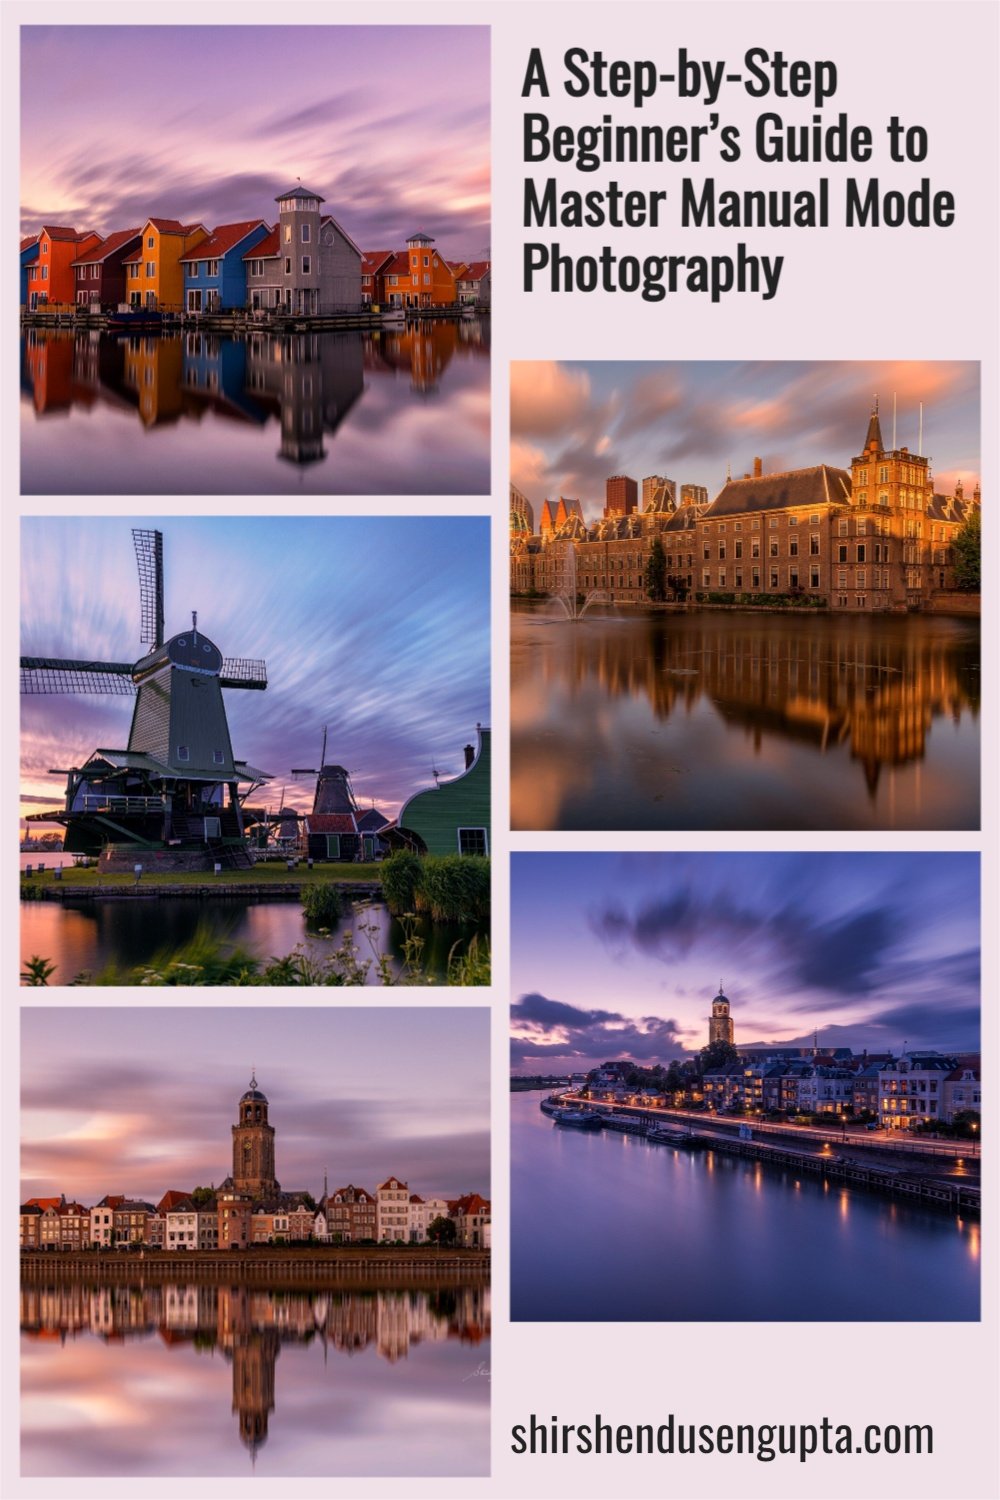
5. Choose the right Priority Mode - Aperture Priority (A), Shutter Priority (S), or Manual Priority (M)
Now that you are cognizant of the ‘Exposure Triangle,’ it is time to think of which ‘Priority Mode’ to use for setting up the three parameters of the ‘Exposure Triangle,’ namely the aperture, shutter speed, and the ISO. Every camera has a full manual mode named the ‘Manual Priority’ mode and two semi-manual modes, namely the ‘Aperture Priority (A)’ and ‘Shutter Priority (S)’ Modes. I will now tell you what these are and when to use which Priority Mode.
The ‘Manual Priority (M)’ mode - In this mode, you control all the three parameters of the ‘Exposure Triangle,’ namely aperture, shutter speed, and ISO. However, I strongly opine that this mode is not needed for most photographers for 95% of the situations barring 5% of the situations like long exposure, sports, action, or wildlife photography, where getting control on both the aperture and shutter speed becomes necessary. To know more about long exposure photography, please read our article A Step-by-Step Beginner’s Guide to Master Long Exposure Photography | Long Exposure Photography Tutorial | 30 Ultimate Tips and Tricks for Long Exposure Photography.
The ‘Aperture Priority (A)’ mode - In this mode, you control the aperture and the ISO, and the camera adjusts the shutter speed to get an optimal exposure. I recommend using this mode 95% of the time as you get to control the depth of the field using the aperture.
The ‘Shutter Priority (S)’ mode - In this mode, you control the shutter speed and the ISO, and the camera adjusts the aperture to get an optimal exposure. I recommend almost never using this mode since losing control of the aperture will result in losing control of the depth of field, which is something that you don’t want. Some sports, action, and wildlife photographers sometimes prefer to use this mode, since to them, getting a tack-sharp image of the frozen motion of a player or an animal is more important than the depth of field or the bokeh (background blur). However, I still don’t think this is needed. In such situations, you have 2 options -
If it’s a well-lit situation - Shoot in ‘Aperture Priority (A)’ mode, set the aperture you wish, set the ISO as ‘Auto-ISO,’ and the camera will then take care of both the shutter speed and ISO to give you optimum exposure and frozen motion.
If it’s a low-light situation (like shooting a bowling match in a dark bowling alley) - The above may not work since the camera may still try to go for lower shutter speeds to allow more light to enter the camera to compensate for the low light. In that case, shoot in ‘Manual Priority (M)’ mode, and take full control of the Aperture, Shutter Speed and ISO to get the image you want.
So I will recommend you to use ‘Aperture Priority (A)’ mode for 95% of the situations, ‘Manual Priority (M)’ mode for 5% of those special situations like long exposure, sports, action, or wildlife photography, never use ‘Shutter Priority (S)’ mode, and leave the ‘Auto’ mode for your kid to play around with.
Also, I would advise you against using the ‘Scene’ modes found on your Priority Mode dial, such as Macro, Sports, Fireworks, etc. for a variety of reasons. The primary cause is that these settings differ significantly not only between different camera manufacturers but also between models. You might not be able to find the same scene mode on a different camera model if you grow accustomed to using a certain scene mode on one camera and then decide to upgrade to a new one in the future. Also, using these scenes, the ‘Exposure Triangle’ will be automatically decided by the built-in presets for each of these modes and you will not have complete control over them. So technically these ‘Scene’ modes are a stepping stone between the ‘Auto’ mode and the ‘Priority’ Modes. I recommend that you take maximum control over the ‘Exposure Triangle’ using the ‘Aperture Priority’ or ‘Manual Priority’ mode and stay away from the ‘Scene’ modes.
6. Cheat ‘Manual Priority (M)’ mode by manipulating Shutter Speed in ‘Aperture Priority (A)’ mode itself using ‘Exposure Compensation’
Now I will tell you a little secret. Apart from long exposure photography, you may actually never need to get into ‘Manual Priority (M),’ even when you need to control the shutter speed like in sports, action, or wildlife photography as I mentioned above. How to do it? By using a setting called ‘Exposure Compensation.’
What is Exposure Compensation?
Exposure Compensation is a way of asking the camera to make the image underexposed (darker) or overexposed (brighter). In Sony and Canon cameras, you have a dial for that, and in Nikon cameras, you have an EV (Exposure Value) button to set the Exposure Compensation. A positive value represents overexposure, and a negative value represents underexposure. You can change the Exposure Compensation in increments or decrements of 0.3 EV (Exposure Value), where 1 EV equals 1 F-Stop of light. The image below shows the Exposure Compensation meter with increments/decrements of 0.3 EV i.e., -3 EV, -2.7 EV, -2.3 EV, -2 EV, -1.7 EV, -1.3 EV, -1 EV, -0.7 EV, -0.3 EV, 0 EV, +0.3 EV, +0.7 EV, +1 EV, +1.3 EV, +1.7 EV, +2 EV, +2.3 EV, +2.7 EV, +3 EV.
So, when you increase or decrease the Exposure Compensation by +1 EV or -1 EV, the light entering the camera is increased or decreased by 1 F-Stop, respectively. Likewise, when you increase or decrease the Exposure Compensation by +0.3 EV or -0.3 EV, the light entering the camera is increased or decreased by 1/3rd of an F-Stop, respectively.

What does the camera do to make the image underexposed (darker) or overexposed (brighter)?
If you are in ‘Aperture Priority (A)’ mode and choose a negative Exposure Compensation value like -1 EV - The camera keeps the aperture constant and increases the shutter speed to allow lesser light to enter the sensor. This also thereby enables you to freeze motion for sports, action, or wildlife situations without pumping up the ISO and introducing grains in the image or having to go into the ‘Manual Priority (M)’ mode. This is what I do for 99% of the situations.
If you are in ‘Shutter Priority (S)’ mode and choose a negative Exposure Compensation value like -1 EV - The camera keeps the shutter speed constant and decreases the aperture to allow lesser light to enter the sensor. This alters the depth of field, and hence I recommend against using the ‘Shutter Priority (S)’ completely.
So you realize that by adjusting the Exposure Compensation while shooting in Aperture Priority (A) mode, you are indirectly adjusting the shutter speed. If you do this, you don’t need to manually set the shutter speed by going into ‘Manual Priority (M)’ mode. You just start from an Exposure Compensation value (e.g., -1 EV) and then adjust the Exposure Compensation (and hence indirectly the shutter speed) based on the brightness or darkness of the output image. If the image is too bright, decrease the Exposure Compensation by one step to -1.3 EV to make the image darker, or if the image is too dark, increase the Exposure Compensation by one step to -0.7 EV to make the image brighter and so forth. So now you know the biggest cheat of your lifetime!
7. Shoot in ‘Continuous AF’ combined with ‘Burst Mode’ for moving subjects
When you are taking a picture of a still object, you should normally use ‘Single-shot AF,’ (or simply ‘AF-S’) with Focus Area ‘Flexible Spot/Expand Spot,’ whereas if the object you are photographing is moving continuously like sports, action, or wildlife, or even babies or pets, you should switch to ‘Continuous AF,’ (or simply ‘AF-C’) with Focus Area ‘Wide,’ because you want your camera to actively track your subject over a wider area. Alternatively, you could select Focus Area ‘Tracking: Expand Spot’ in conjunction with ‘AF-C,’ and then press the focus button to lock the focus on the subject that the camera would then track.
In some of the latest cameras, there are ways to track a moving subject without even going to AF-C mode. If you have set up a custom button with the functionality of ‘Tracking On + AF On’ as explained above under ‘Operation Customize Settings,’ you can use it to start tracking a moving subject even when you are in AF-S mode. Alternatively, if you have a touch screen, you have to enable touch tracking in the settings as explained above under ‘Touch Operation Settings,’ and then by simply tapping on the subject on the LCD monitor, you can track the subject even when you are in AF-S mode.
Along with that, use a fast shutter speed and shoot in ‘Burst Mode,’ which enables the camera to fire multiple shots (as long as you click and hold the shutter button) instead of just one shot. To enable burst mode in your camera, go to your camera settings and select ‘Continuous High (CH or high-speed burst mode)’ as ‘Drive Mode’ for Sony or ‘Release Mode’ for Nikon.
Burst mode ensures that the motion is frozen further and no moment is missed. This has a couple of benefits. Firstly, when you come back home, you can choose which one to keep, e.g., in the image below, I took a 10-shot burst of the flying birds and kept the one that had the diagonal formation. I could have never achieved this with a single shot.
8. Save the different Settings (Still, Sports, and Long Exposure in ‘Camera Memory’ and ‘Recall’ when needed)
So now that you’re aware of all the ‘fixed’ and ‘variable’ camera settings for photography, I recommend you to save/register 3 different sets of settings (if your camera allows you to save/register often-used settings) namely ‘Still Shooting Mode,’ ‘Sports Mode,’ and ‘Long Exposure Mode.’
To save these sets of settings, first do the following settings in your camera, and then save/register the settings by going to Shooting Mode Settings -> Camera Settings Memory -> Slots 1, 2, or 3. After you have saved it in your preferred slot, whenever you want to use these settings, turn the dial to that specific slot number (as shown below) to recall/load the settings from the camera memory.

1. Still Shooting Settings
Go to ‘Aperture Priority Mode’ on the Dial and change these Camera Settings -
Aperture: F8
ISO: 100
Exposure Compensation: -1.7EV
Focus Mode: AF-S
Focus Area: Expand Spot
Focus Point: Center
Note: While shooting portraits, turn the aperture wheel from ‘F8’ to ‘F2.8’ or whatever is the least ‘F’ value, i.e., the largest aperture of your lens.
2. Sports (or any moving subject) Settings
Go to ‘Aperture Priority Mode’ on the Dial and change these Camera Settings -
Aperture: F2.8 (or whatever is the least ‘F’ value i.e. largest aperture of your lens)
ISO: Auto
ISO Auto Minimum Shutter Speed: 1/500
Exposure Compensation: -1.7EV
Focus Mode: AF-C
Focus Area: Tracking: Expand Spot
Focus Point: Center
3. Long Exposure Settings
Go to ‘Manual Priority Mode’ on the Dial and change these Camera Settings -
Shutter Speed: Bulb (You can select ‘Bulb’ as Shutter Speed only if you select ‘Single Shooting’ as Drive Mode)
Aperture: F8
ISO: 100
Exposure Compensation: 0EV
Focus Mode: AF-S
Focus Area: Expand Spot
Focus Point: Center
SteadyShot: Off
Drive Mode: Single Shooting
9. Save the Settings Configurations in your Memory Card
Go to Menu -> Setup -> Reset/Save Settings -> Save/Load Settings -> Save
Epilogue
So that was the step-by-step beginner’s guide to master basic camera settings for photography. Please let us know in the comments below if you enjoyed reading this article and if it helped in some way in your photography journey.
If you want to master the best camera settings for videography, please read our article Ultimate Guide to the Best Camera Settings for Video Shooting. Additionally, if you want to fully transition from shooting in ‘Auto’ mode to ‘Manual’ mode, learn how to ‘Expose for the highlights,’ understand the histogram, and learn the composition rules, I recommend you to read our article A Step-by-Step Beginner’s Guide to Master Manual Mode Photography | Manual Mode Photography Tutorial | 14 Ultimate Tips and Tricks for Shooting in Manual Mode. And once you have captured mind-blowing RAW images in Manual Mode, you need to learn how to make the most out of your images through post-processing. For that, I recommend you to read my article My Step-By-Step Photo Post-Processing Workflow | A Beginner’s Guide to RAW Photo Editing | Adobe Lightroom, Photoshop, and Nik Collection Tutorial. Until then, merry traveling and happy shooting!
Pin the article
Bookmark the article for reading later!

Want to license/buy photos in the article?
License photos for commercial/editorial use or buy photo prints!
Want us to write an article for you?
Articles for magazines, newspapers, and websites!
Watch our Videos
Check out our videos on our Youtube Channel!
Join the Newsletter
Get updates on our latest articles!
We respect your privacy. Read our policy here.